Overview
The 3D View can be used to interact with the final point cloud, and the panoramic imagery. The panoramic imagery files are the same as the ones that can be accessed from the 2D view, the only difference being that you can see their position in 3D.
3D View Controls
In the 3D View, use left-click to pan, right-click to rotate, and the scroll wheel to zoom. The background can be toggled between steets and satellite imagery.

Captures (A): A list of all the Captures assigned to this site.
Screenshot (B): Screenshot capture, email, and download tools.
Navigation (C): There are three different navigation options available.
- Orbit: Left click is used to rotate around the default center of the point and right-click to pan. The central rotation point can be changed by double-clicking on a new location.
- Earth (Default): left-click is used to pan around, and right-click to rotate. A circle will appear on-click representing the center of rotation. The scroll wheel is used for zooming in and out.
- Flight: Arrow keys are used to move forward, backward, right, and left and left-click to steer the direction of flight. Right-click is used to pan, and the scroll wheel to control the speed of flight.
Point Settings (D): Options to change point size, lighting, and shading.
Cross Section and Clipping Tools (E): These tools are used to clip areas of the point cloud to make them easier to view in detail. They will not delete or remove points, and the point cloud can be reset at any time by hitting the Reset button.
- Clipping: To isolate an area within the point cloud, you can use the clipping tool. Click on the swissors icon, and left-click to place your clipping box. The highlighted points represent that area that will be clipped. After placing the box, left-click on it again to edit the selection area. Use the red, green, and blue points and lines to expand and rotate the area until you are satisfied with your selection.
The Inside command keeps points inside the clipping box.

The Outside command keeps points outside the clipping box.

Cross Section: To view a cross section of an area within the dataset, click on the "cropping" icon under the Cross Section header.

Select your cross section profile using left-click, and end the selection using right-click. You will see a highlighted section indicating where the cross section will be. You can edit the location by left-clicking on the starting and ending nodes and dragging them to the correct location. Enter the desired cross section width in the box, default width is 1. When you are satisfied with the selection, press Show and it will launch the cross section viewer (pictured below).

The profile location can be altered at any time by dragging the nodes, or using the up and down arrows in the top right corner of the cross section viewer. The data in the cross section can be downloaded as a .CSV or .LAS file using the download options in the top right corner of the viewer. When you are finished viewing the cross section, close the tool.
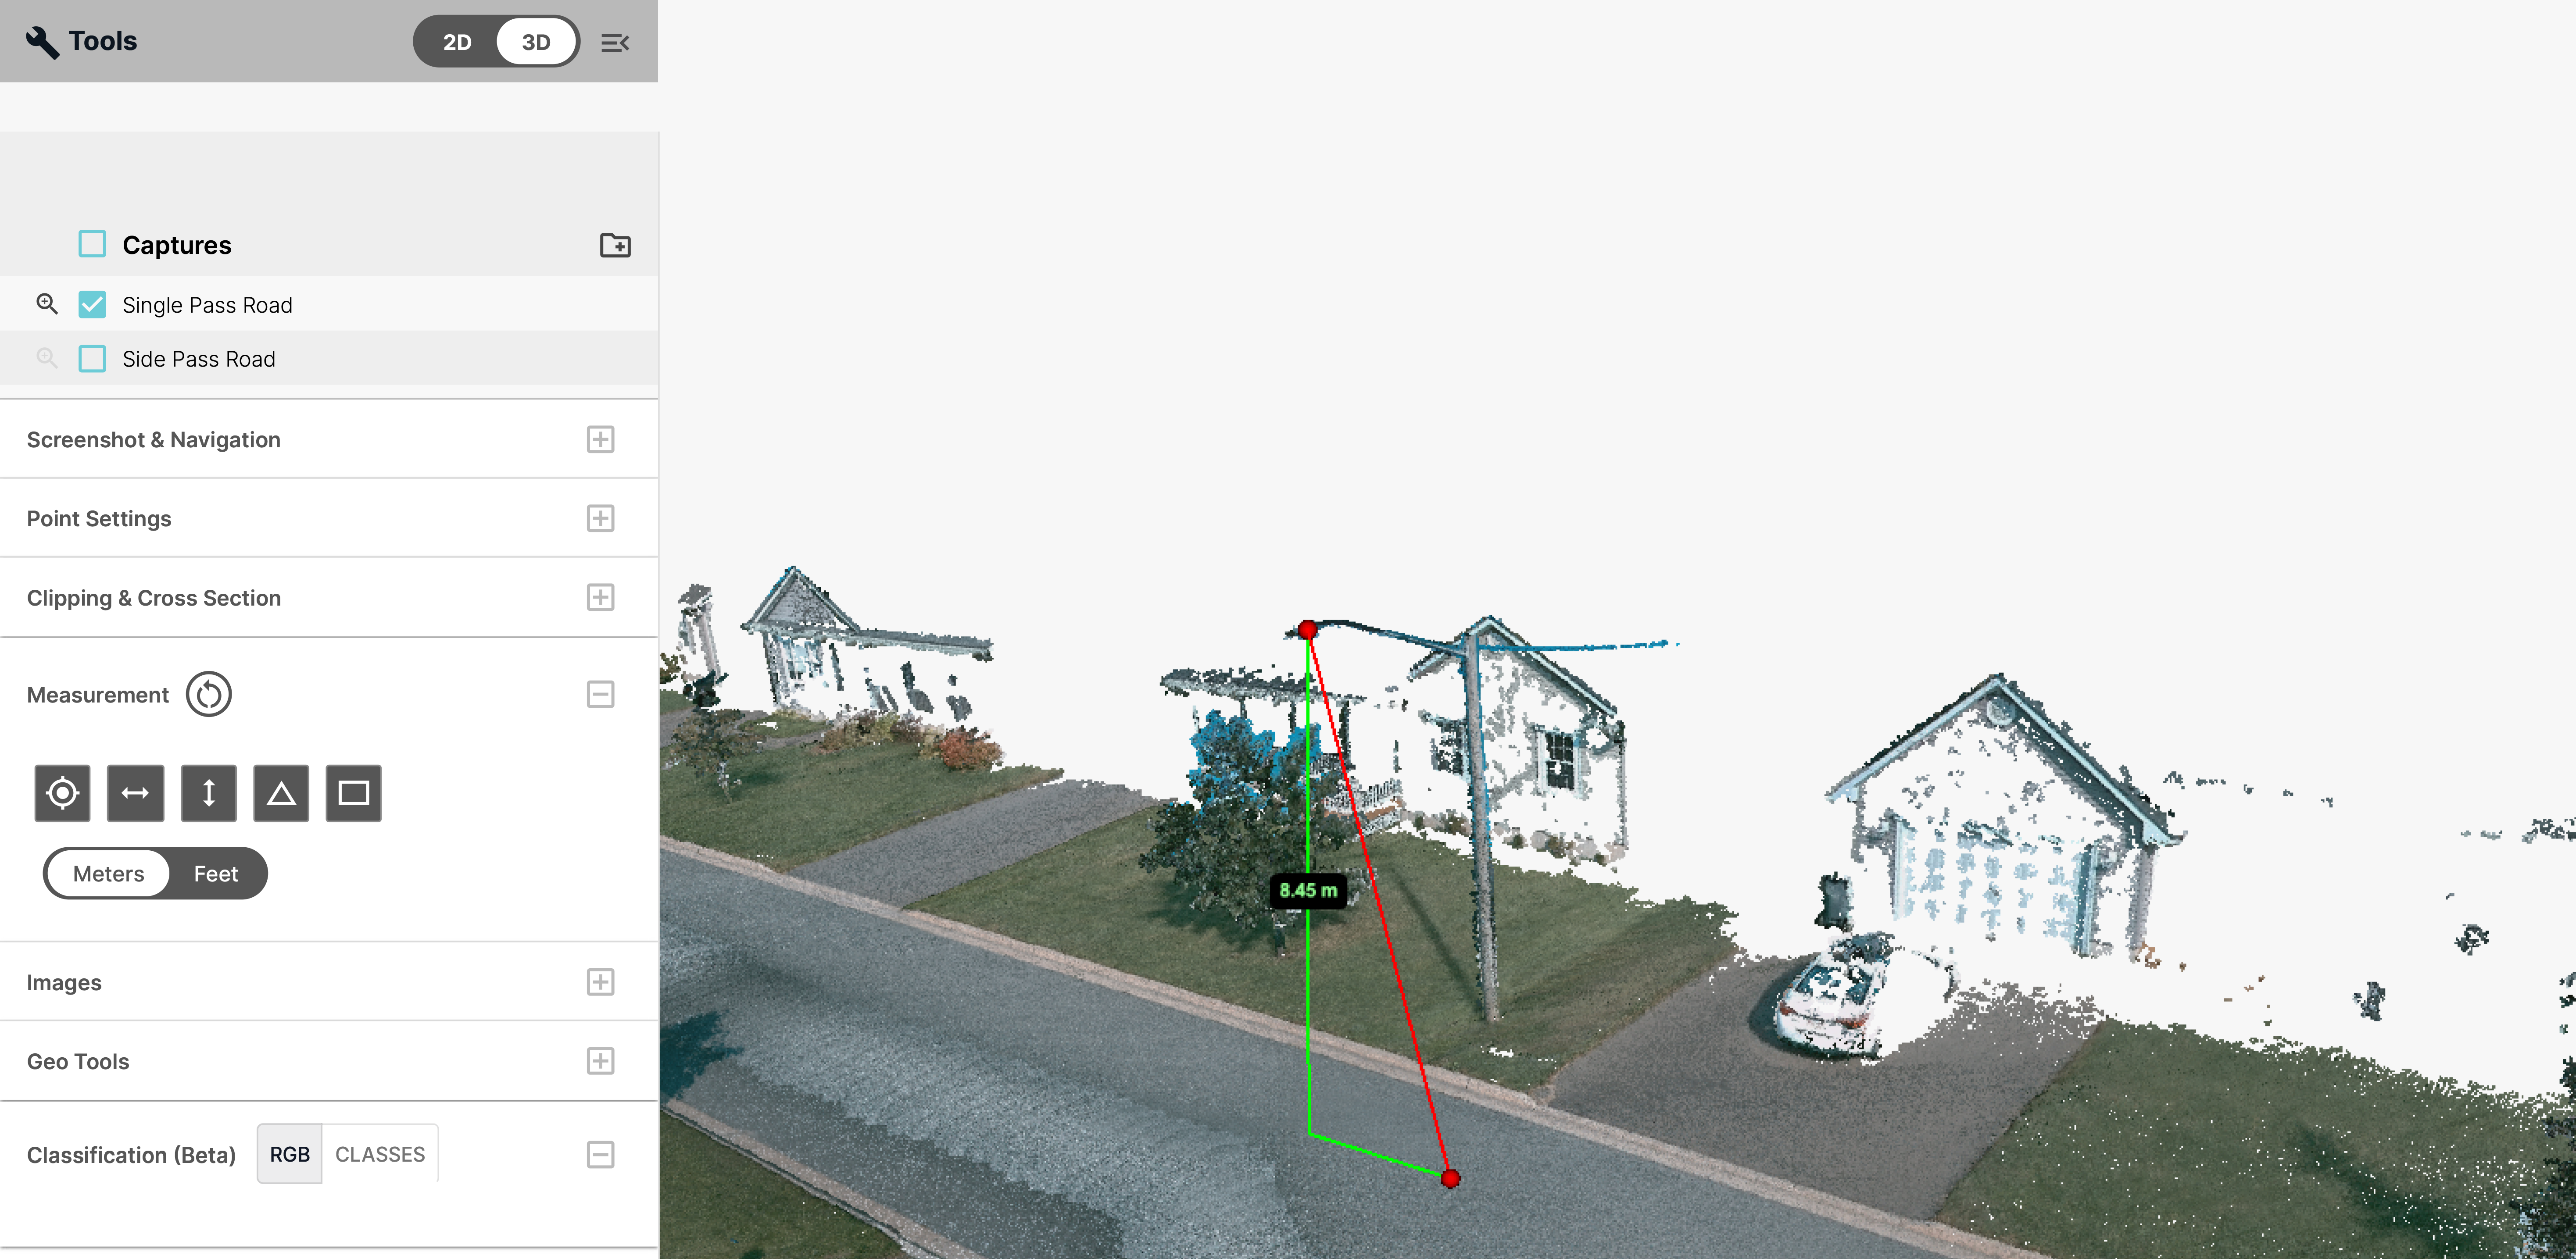
Measurement (F): The 3D tab also has basic measurement functions including: point, distance, height, angle and area.

After selecting the tool you want to use, left-click on the point cloud to begin a measurement and left-click to end. The tools snap directly to points, so measurements cannot be taken in areas with no data.
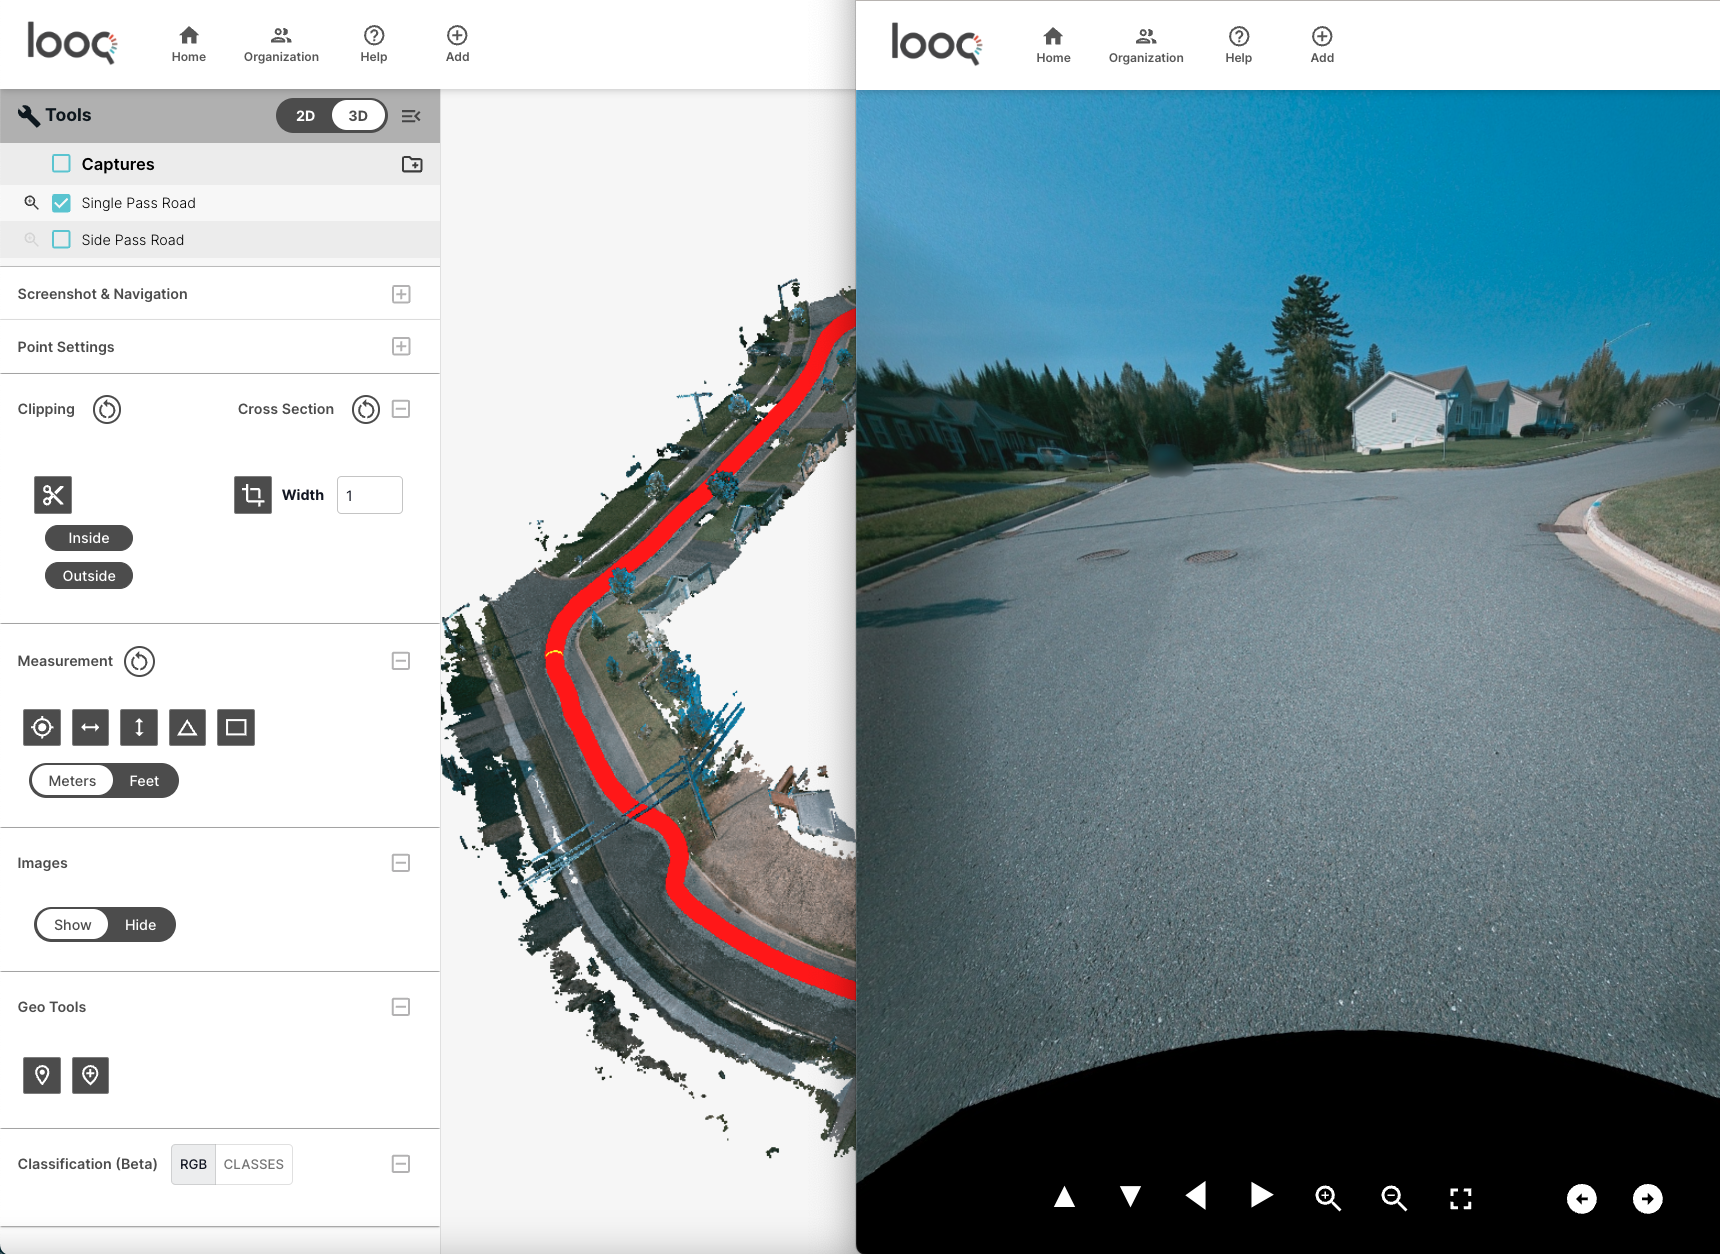
Images (G): This is the toggle option for the panoramic images. Enabling it will populate the view with red dots representing all of the panormaic image locations. Clicking on one of the red dots will load a pop-up window with the image from that location. Once an image has been selected, the associated dot will change from red to yellow. You can use left-click to pan around, and the scroll wheel to zoom in to inspect an area in greater detail. The pano viewer also has built-in tools for panning, zooming, fullscreen, and navgitating to the next image sequentially. These panos can be downloaded localy as .JPG files, insctuctions for file download can be found on the Files (Download) page.
GeoTools (H): Our custom "GeoTools" can be used to import and align to ground control points or select and export manual pick points.
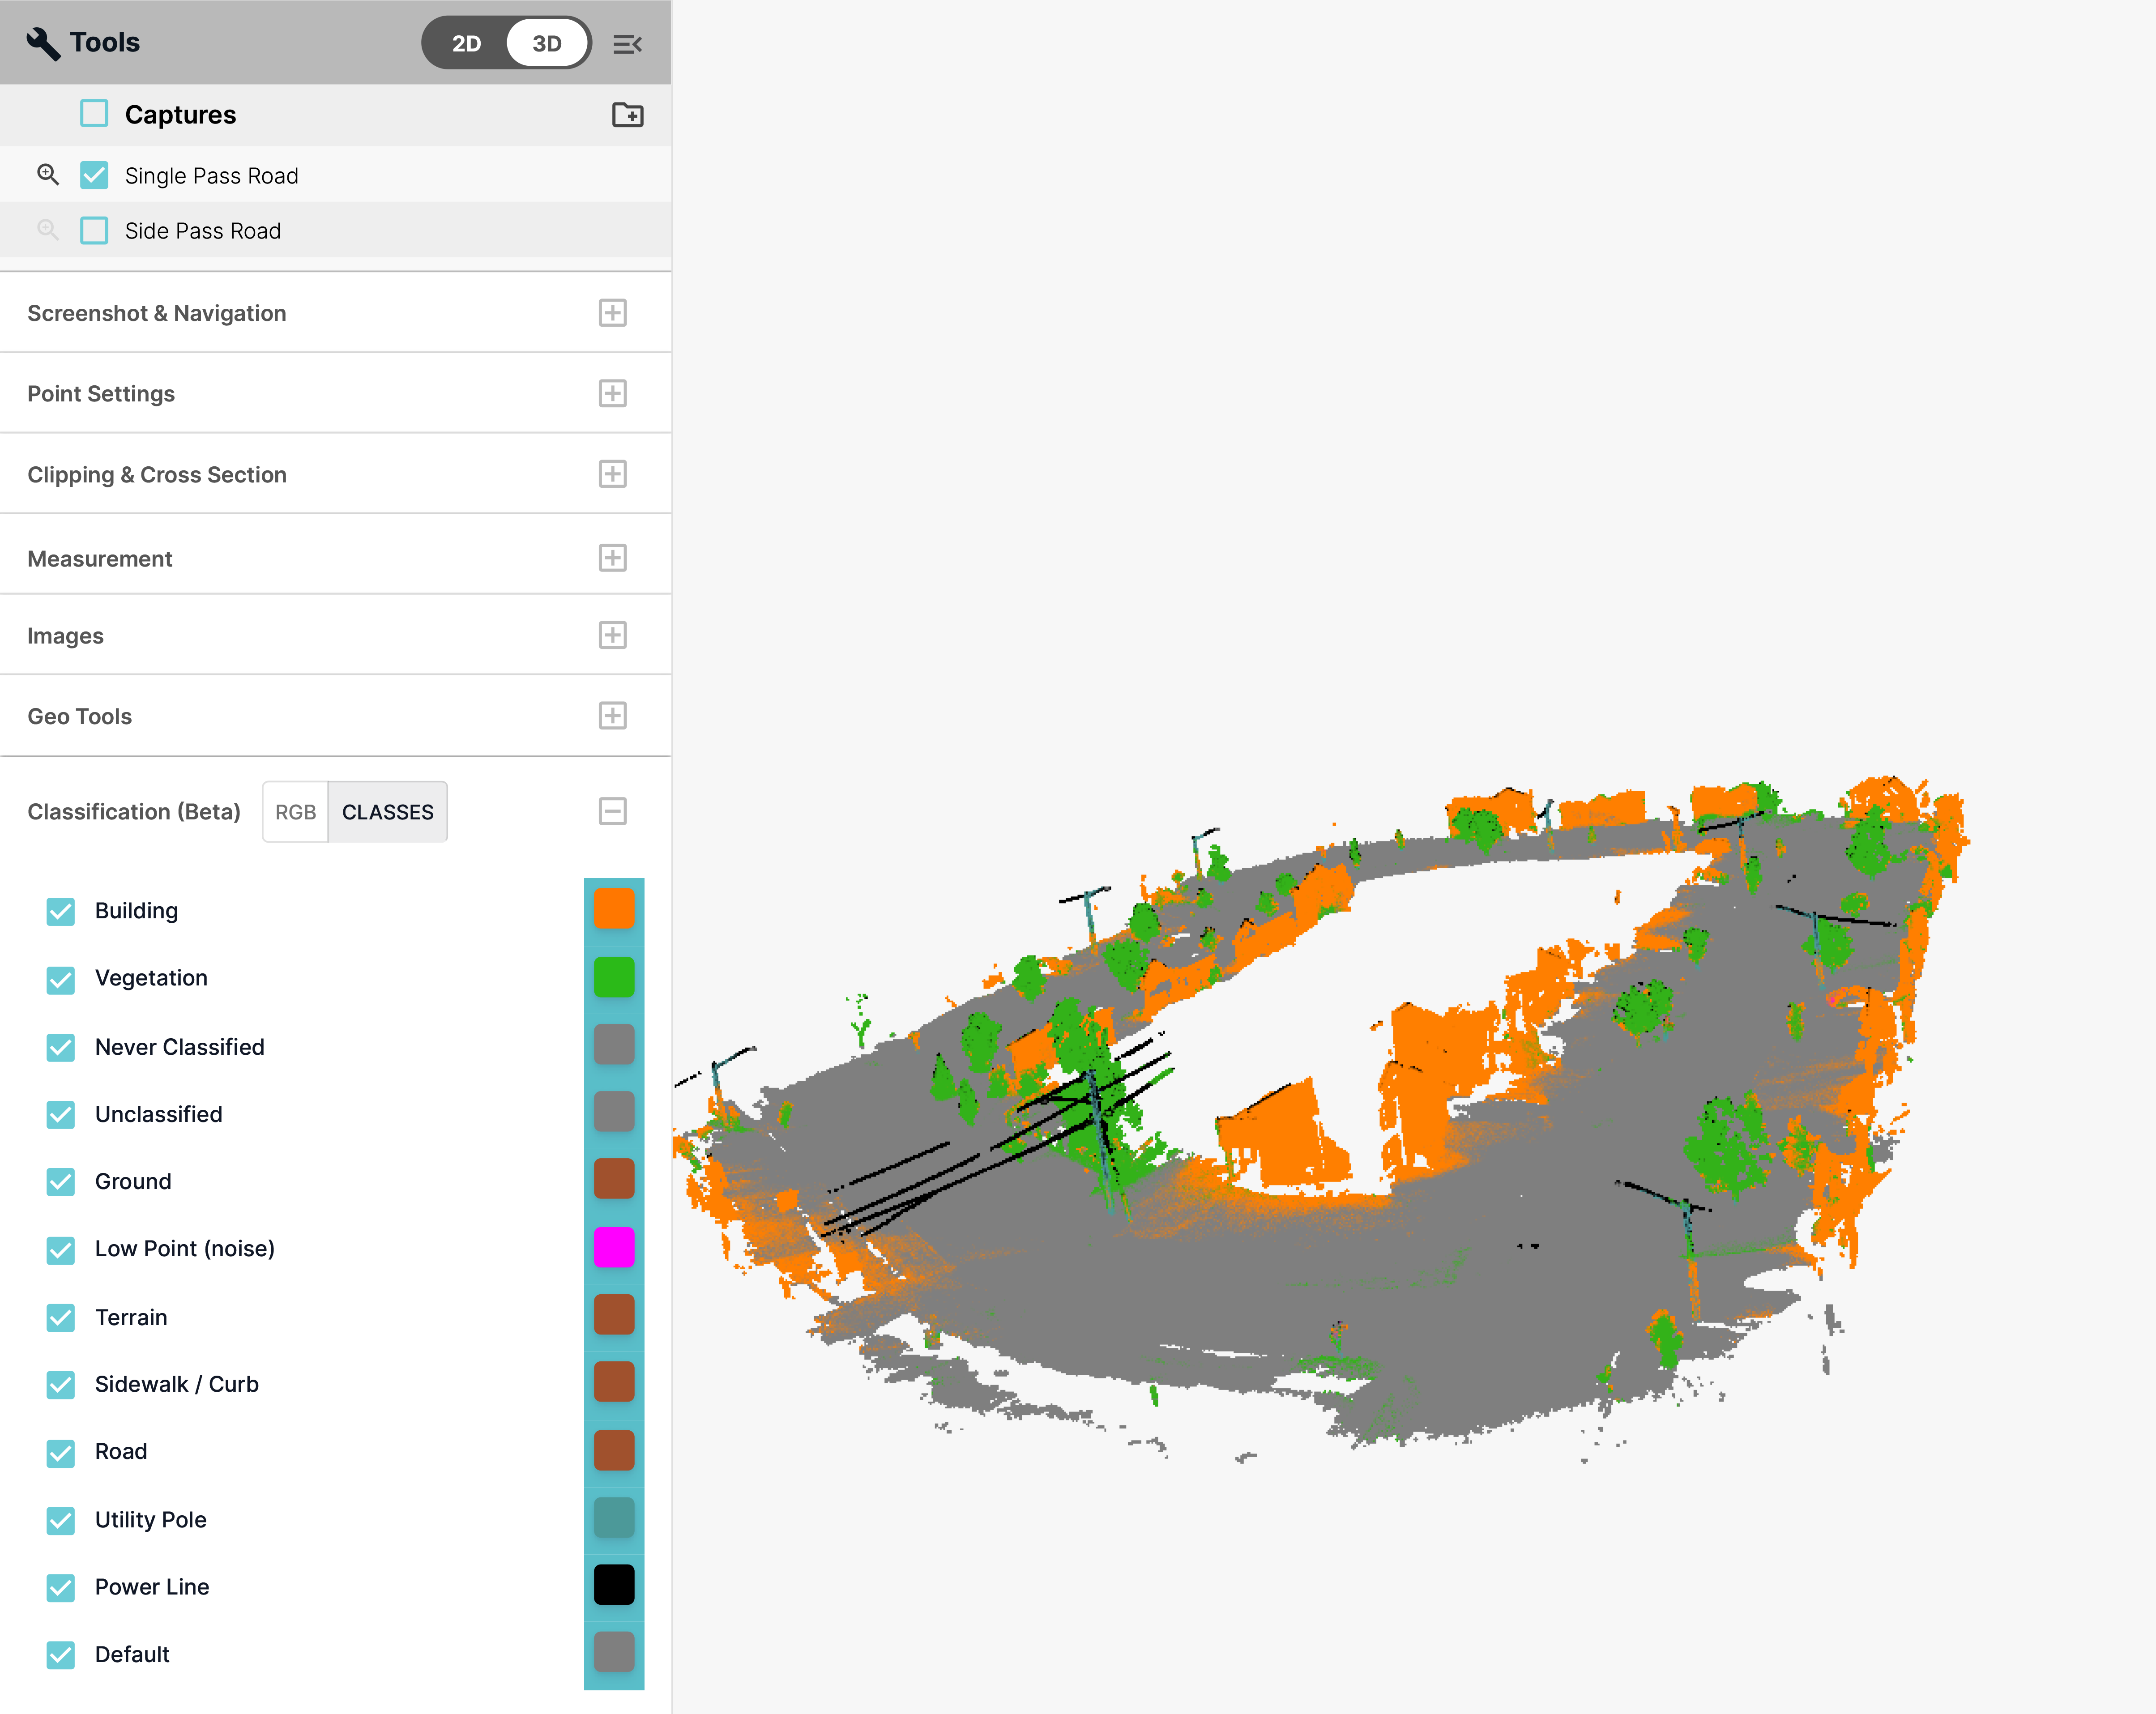
Classification (Beta) (I): Our Custom, Beta Classification tools automatically identifies & classifies objects in the pointcloud.