Overview
The 2D View can be used to view and interact with the panoramic imagery and nadir views of the dataset. The 2D portion of the processing will finish first, and will be available before the 3D.
2D View Controls
In the 2D View, use left-click to pan, right-click to rotate, and the scroll wheel to zoom. The background can be toggled between streets and satellite imagery.
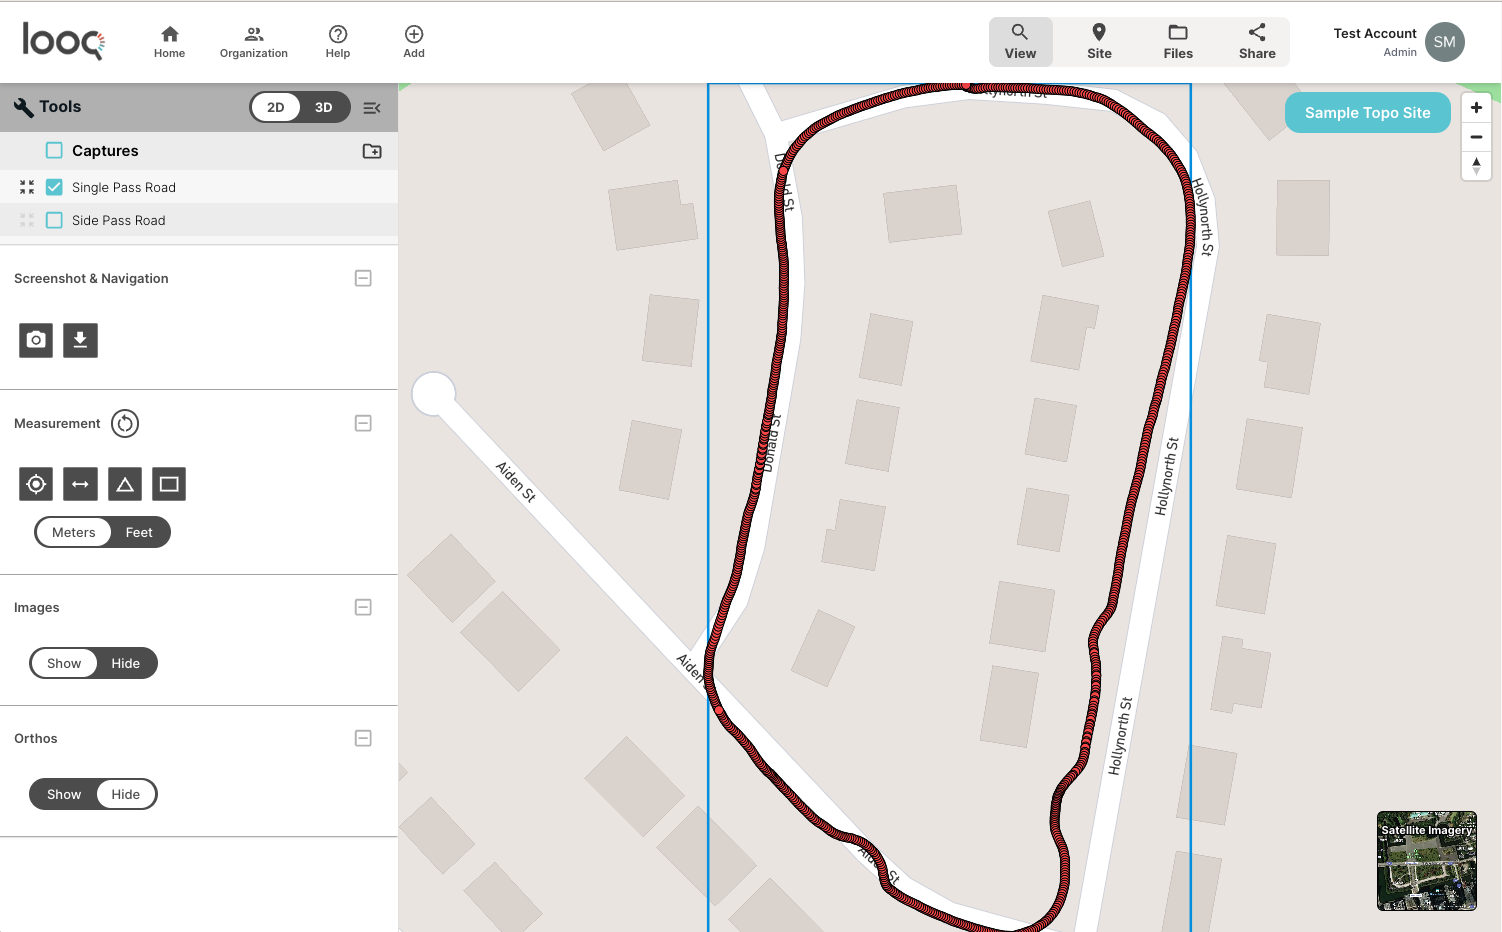
- Captures: A list of all the scans assigned to this site.
- Screenshot & Navigation: Screenshot capture and download tools.
- Measurement: Measurement tools including: point, distance, area, and angle. Left click to begin the measurement and left click to end. After you have completed a measurement, you can use left click to move line and area feature nodes. The Reset button will clear all measurements.
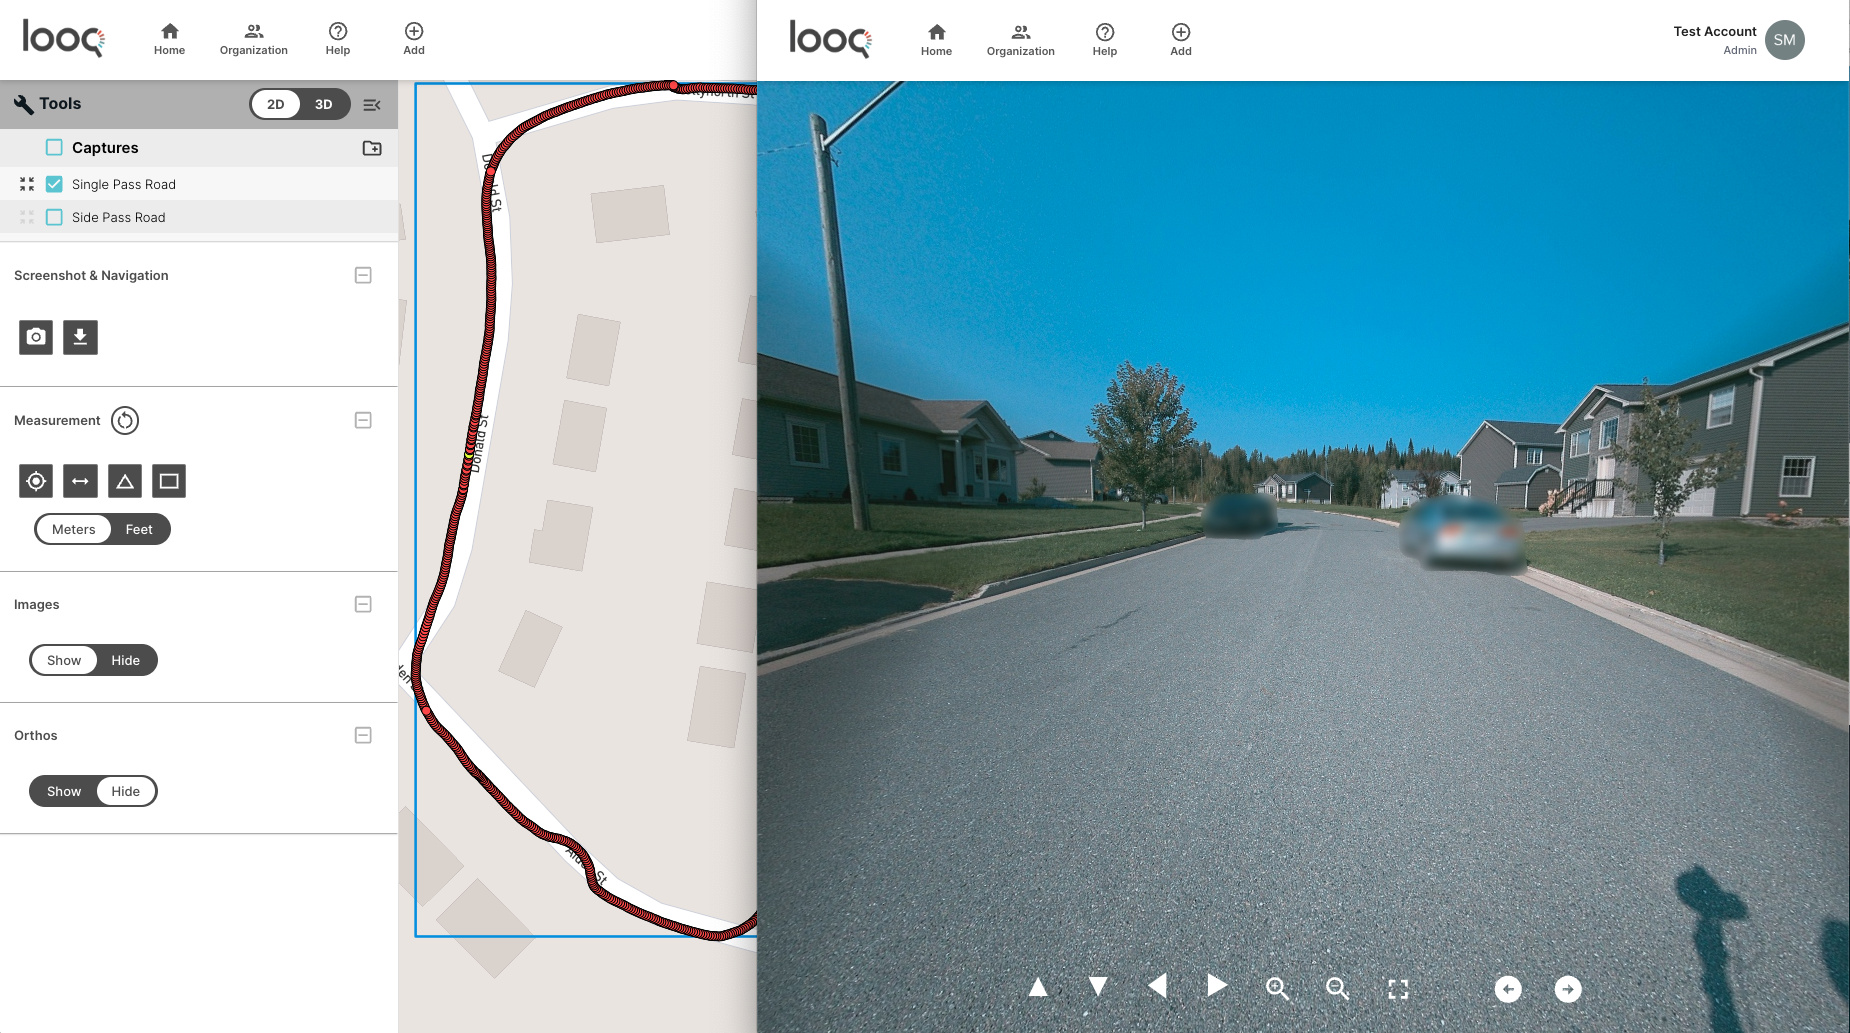
- Images: This is the toggle option for the panoramic images. Having it enabled, it will populate the view with red dots representing all of the panoramic image locations. Clicking on one of the red dots will load a pop-up window with the image from that location. Once an image has been selected, the associated dot will change from red to yellow. You can use left-click to pan around, and the scroll wheel to zoom in to inspect an area in greater detail. The pano viewer also has built-in tools for panning, zooming, full screen, and navigating to the next image sequentially. These panos can be downloaded locally as .JPG files in the files folder, instructions for file download can be found on the Files Download page.
- Orthos: This is the toggle option for the nadir (bird's eye) view of the dataset. If you have enabled ortho processing, you will see this toggle option available. This file can also be downloaded locally as a .TIF file, instructions for file download can be found on the Files Download page.